Grungy Background Tutorial!
Outcome:

Step one - 1
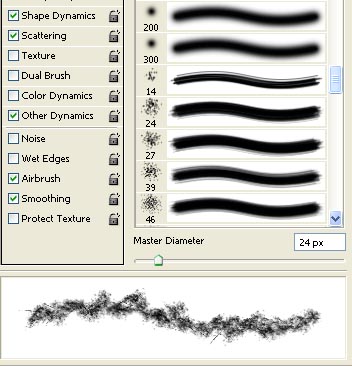
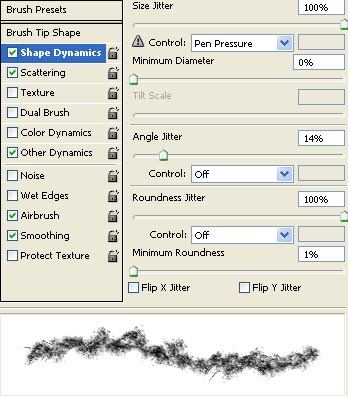
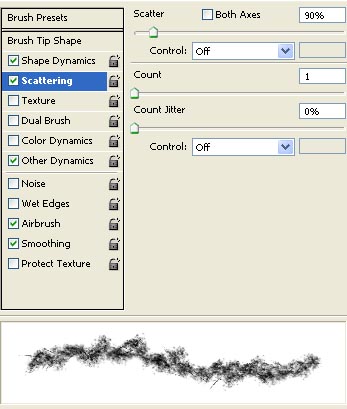
First, make a new document with WHITE background. Then select the brush tool and use these settings and brushes:
Step two - 2
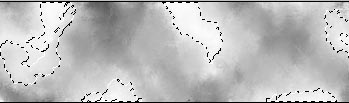
Now, randomly add some brushing onto the white background like so:
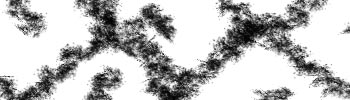
Make sure you cover at least 50% of the background, but also leave some white spots.
Step three - 3
After you have done this, select the smudge tool (right click the blur or sharpen tool to find it) and use the same settings as for the brush. Set the smudge strength to
30 - 40%.
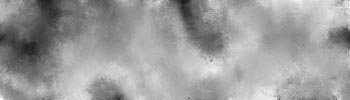
Now start smudging the black parts like so:

Step four - 4
Select the magic wand and start selecting the white parts like so:

Don't select too much, else the signature will be very dark.
Step five - 5
Now make a new layer in the layer window.
Fill up the selection by setting the foreground color to black and going to edit -> fill... -> foreground color.
After filling it up, select the smudge tool again and smudge the black parts. You should now have something like this:

Step six - 6
Double click the background layer and name it layer 0 or whatever you want it to be. Now move layer 1 under the background layer and set the background layer on overlay.
Make a new layer, make it black (go to edit -> fill -> foreground color). Add some lens flares (Filter -> Render -> Lens Flare).
Step seven - 7
Take out the smudge tool once more and smudge the Lens Flares like so:
Now set this layer to overlay and move it under the background layer and you will have something like this:

You might want to smudge one of the layers some more for a smoother effect.
Step eight - 8
After you have done this it's time to add some depth and effect to the sig.
Make a new layer and set it on Overlay. Go to: Filter -> Render -> Clouds and repeat this (without the making new layer part) until you feel comfortable with the effect:

Now select the brush tool and set the color to white. Make a new layer and brush over some dark parts of the sig.
Set the layer on Overlay and select the smudge tool. Smudge the white until the flow is right:

Step nine - 9
Now go to the layer window and look for the black and white button, click it and select Gradient...:

Now play around a little with the different colors, I used a white to transparent gradient to lighten up the dark spots, don't forget the put the gradient layers on Overlay.:

Step ten - 10
Make another layer and add some black brushing using the same technique as done with the white brushing.
After doing so, click the black and white button again and click Levels... You will get a pretty complex graphics. Play around with the little arrows a little until you get the right result.
Now you can also add some more gradient layers and other black and white brushing.
You should have something like this:
To complete the signature, just add a render, some text and a border.
I hope you enjoyed this tutorial. Please feel free to post your outcomes!


